

They really dont take long once you figure out how to make them! Here are the supplies you will need:
- cardboard party hats {I bought mine from Hobby Lobby for a few dollars}
- cute scrapbook paper
- hot glue gun & hot glue sticks {plus or minus some aloe vera for all of those burns I give myself!}
- pen
- scissors
- the decor that you use to finish the hat with is totally up to you and your creativity! {I bought these white cotton balls from hobby lobby.. they have lots of other things you could use too like feathers, glitter balls, etc.}

Step 1: Unfasten the cardboard hat that you bought and trace the shape on to the back side of the scrapbook paper

Step 2: Cut out the pattern **NOTE: leave about a quarter of an inch border around the border that you traced from the hat. It will allow you to glue the paper over the side of the cardboard to give you nice smooth and clean edges** {Scroll down to the bottom pictures and it will make more sense}

Step 3: Begin gluing the bottom edge of the hat onto the paper. Make sure the edges of your tracing on the paper fit nicely with the hat edges

Step 4: After gluing the bottom edge of the hat onto the paper, cut trianges every half inch to an inch to allow the paper to be folded over and glued to the hat
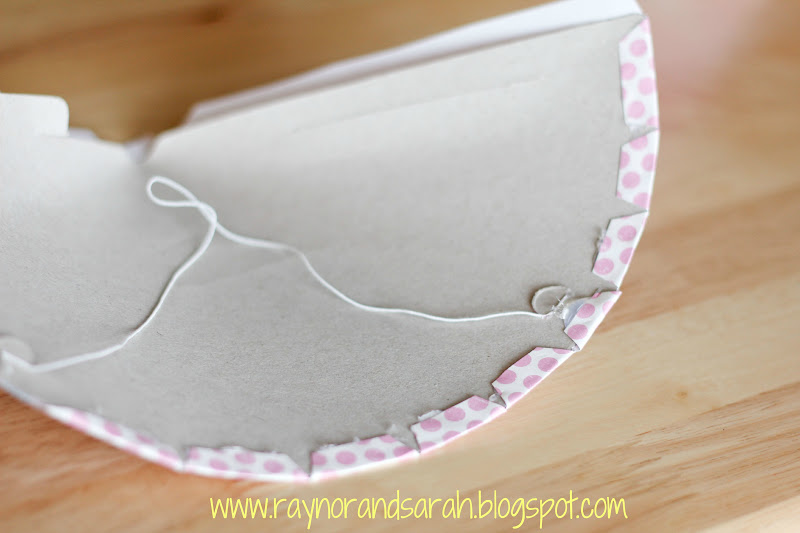
Step 5: Fold over the paper and hot glue it to the hat


Step 6: Next, glue down the left side and top hole of the hat. **It is important to not glue down the right side because you will have to fasten the two sides together and it is much easier to connect them before the right side flap is glued down. {you may have to play around with this step, I found the most difficult part of this project was figuring out how to get the two sides fastened back together}

Step 7: Once the two sides are fastened together and it looks like a hat again, you can fold over the right side paper flap {for neatness} and then glue the two sides together to make it more secure.

Step 8: Decorate! Add whatever embelleshments you like: pearls, rhinestones, burlap, feathers, paper doilles, etc!
Super cute! Good job mama Sarah!
ReplyDelete